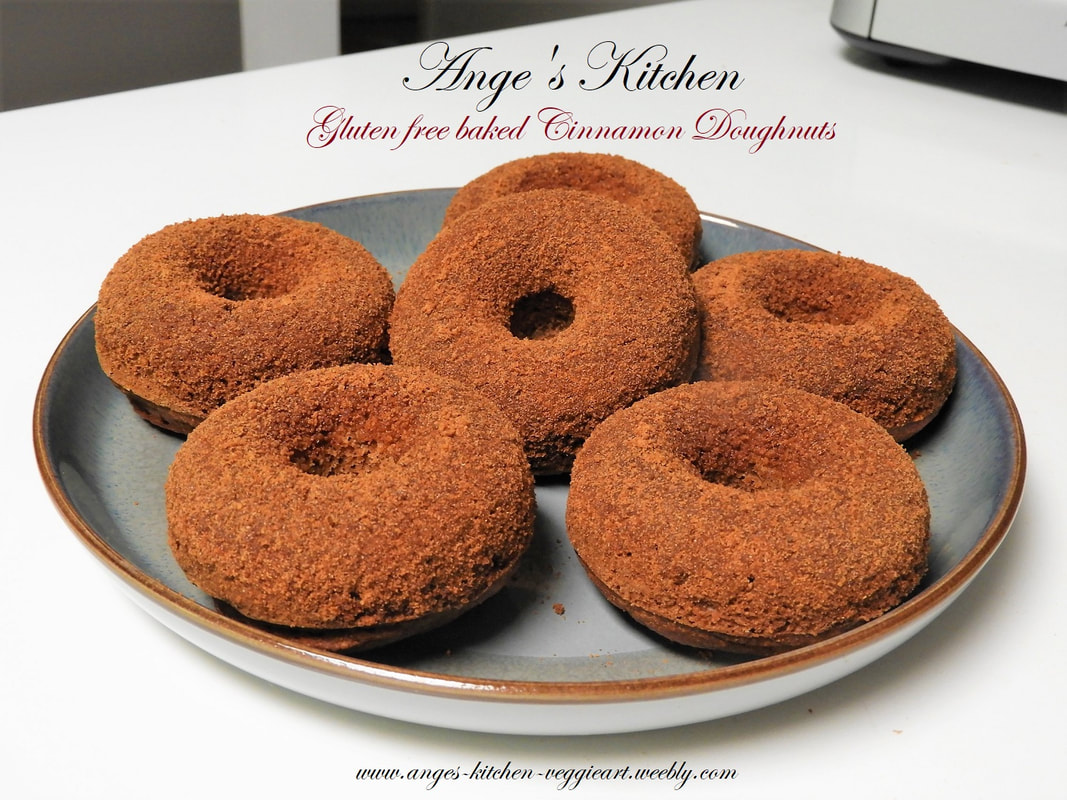
Gluten free baked Cinnamon Doughnuts
please check out my recipe here....
anges-kitchen-veggieart.weebly.com/gluten-free-delights.html

Banana Chocolate Chip Cake
Check out my recipe for this delicious cake here
anges-kitchen-veggieart.weebly.com/gluten-free-delights.html

Sticky Chocolate Oat Pudding
with Banana
I really was in the mood for some chocolate pudding. And I had this idea.
Why not do a dessert what fills you up, but in a good way.
No refined sugars. No added fat. Gluten free.
But a good source of Magnesium, Iron, Copper, Phosphorus, Zinc and Folate.
Sounds pretty good to me.
This is a perfect "dessert" for your lunch box. And if you like, enjoy for breakfast.
Breakfast or dessert,... snack in between.
In my opinion, chocolate and banana are one of the best combinations.
I loved to buy dark chocolate coated fresh bananas back in Germany.
So delicious.
For this recipe, about 2 serves you will need:
50g (5 tbsp) very finely ground gluten free oat flour
1/3 pot of fresh Vanilla (the seed paste inside)
1,5 tbsp organic cocoa powder
1/2 tsp un-bleached Tapioca flour
2 tbsp maple syrup
1 pinch of pink salt
250ml filtered water
1 banana for topping
Directions:
1. Grind gluten free oats in your kitchen machine or Nutribullet until very fine.
2. Add into a cooking pot with the vanilla, tapioca, salt, cocoa powder and water.
Stir well to combine and heat until slightly boiling.
Stir all the time at this point to not burn it.
Cook for a minute and turn down the heat to a minimum.
Cook for about 5 minutes, stirring constantly to smooth it.
3. Turn off the heat and add the maple syrup. Stir well and add into a dessert glass or lunch box jar.
Cool down complete and store in the fridge until chilled.
4. Top with sliced fresh banana,... and enjoy :-)

Spiced Carrot Cake Pudding
with Lemon Icing
I first was unsure to add this recipe to my webpage.
But my partner thinks this is a nice cake and I should add it.
I hoped for a rich and fluffy cake. But it turned out unexpected... different.
I already have a carrot cake recipe. But this is a bit different.
The consistency is different to a cake. More pudding like.
That's why I named it Cake Pudding.
I first thought this cake will be gummy like. But it isn't.
It is pleasant to eat. Moist and pretty tasty.
The lemon icing really is great. Brings the flavours together.
So here it is :-)
I juiced some carrots the other day. And I always feel sorry to throw away so much food.
So I decided,... lets do a carrot cake with one half and some fritters with the other half.
I am happy I did. This really is tasty and pleasant to eat.
So if you like pudding like cakes,... you will like this.
For the cake you need:
100g gluten free oat flour (just grind gluten free oats)
100g white Sorghum flour
1/2 tbsp (5g) Tapioca starch
1/2 tbsp Flaxseed flour
1/8 tsp Nutmeg
1/8 tsp Cardamon
2 tsp Cinnamon (from Aldi, because it doesn't contain fillers)
2 tsp Vanilla sugar
1/2 tsp bi-carb
1 tbsp cocoa
70ml Maple syrup
1 pinch of pink salt (or seasalt)
120g of the carrot pulp from the juicer
400ml cashew milk***
***mix 50g raw cashews with 300ml filtered water and blend with a Nutribullet.
You should end up with 400ml liquid. If its not 400 add as much water it needs to end up with 400ml.
For the icing:
100g organic, unbleached, unrefined and aluminium free icing sugar
(organic stores should store that product)
1 tsp fresh grated lemon zest
2 tsp fresh lemon juice
2-3 tbsp cashew cream or milk
1 small pinch Turmeric powder
Direction:
Preheat oven to 180C
1. Add all ingredients for the cake into bowl and mix well to a smooth batter.
2. Add batter into a small spring form and bake for 35 minutes.
Test with a wooden skewer.
Pierce in the middle of the cake and when the wooden skewer comes out clean,... its done.
3. Remove from oven and cool down complete.
4. Add all ingredients for the icing into a bowl and mix well.
Spread on the cake and wait until it has firmed. You can add the cake into the fridge to quicken this.
5. Store in the fridge and remove from fridge 1 hour before you want to eat it.
But its ok to not store in the fridge. But I like it a bit chilled. Makes the cake pleasant to eat.

Spiced Carrot & Walnut Cake
I baked a really nice Easter cake. Please feel free to check on my recipe here:
anges-kitchen-veggieart.weebly.com/gluten-free-delights.html
Of course the cake is good to eat all year around ;-)
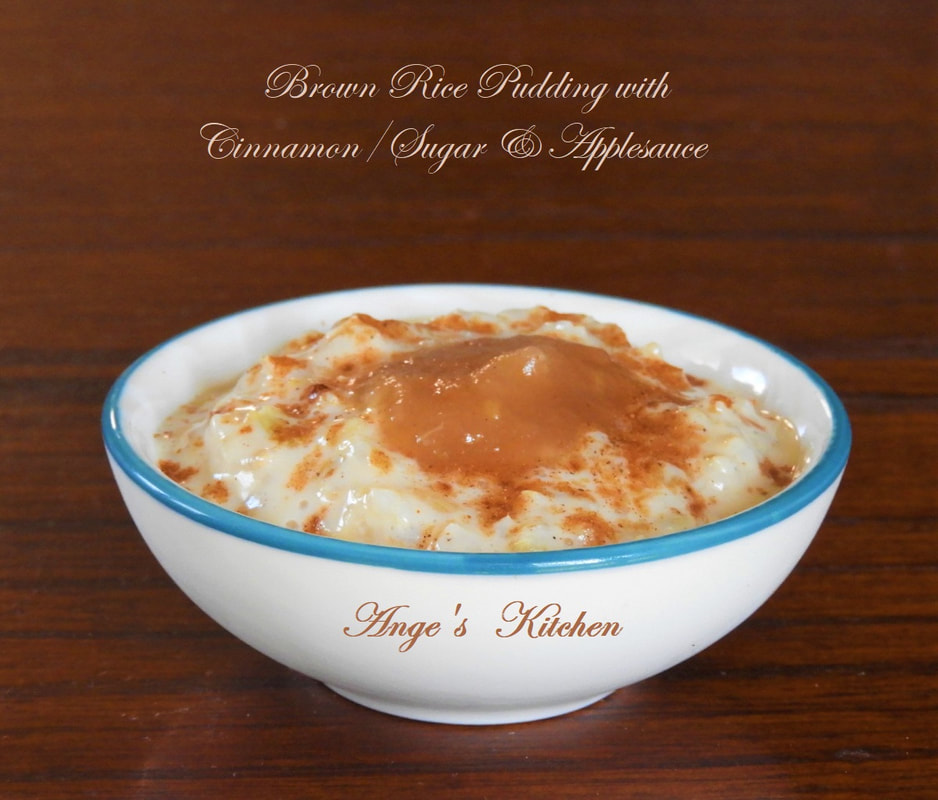
Brown Rice Pudding
with Sugar/Cinnamon & Applesauce
If you are ok with rice, this will be a really great treat for your taste buts.
I cooked it with brown rice and Bonsoy milk. For the MM program choose a different plant milk.
If you are ok with soy milk,... I recommend Bonsoy for this dish, because the milk is really a great product.
If you do not like to cook it with soy milk,... you can choose unsweetened brown rice or almond milk.
To see the recipe, please follow this link,....
anges-kitchen-veggieart.weebly.com/desserts--cakes.html

Like every year at Valentines Day,... I post my raspberry jelly hearts.
I just realised, the recipe is actually MM save.
I know, chocolate is not on the YES list, but also not on the NO list!
And I think to enjoy it on special occations is just fine.
If you do not feel comftable with the chocolate,
maybe the jellies on their own are already good.
But I don't know, I never made these without the chocolate.
I personally think this is a really nice gift for someone you love.
So,...
To make 16 hearts I used:
1 cup of frozen raspberries,
a little bit of water (approx 100ml),
juice of half a small lemon,
1/4 cup of Maple Syrup
(if not sweet enough add 2 tbsp coconut sugar as well)
half a tsp of rosewater***
2 tbsp vanilla bean sugar
(or half a fresh vanilla pod)
2 tbsp agar agar powder
80-100g dark chocolate
1 tbsp vanilla sugar,
2 tbsp dessicated coconut for garnish
***raspberry and rosewater really are great together.

German Christmas Cinnamon Stars Bickies
(Plätzchen)
To bake bickies is a tradition in Germany in a lot of households at Christmas.
The baking already starts weeks ahead. Bickies, Gingerbread, Stollen,...
Cinnamon stars and other bickies simply belong to Christmas like Gingerbread, Stollen and Santa!
I figured out a really great gluten free version. But, the gluten free version is not MM approved,
because it is made with a different typ of flour and Nuttelex, what contains canola oil.
I also used organic raw sugar instead of maple syrup.
The flour itself is gluten free, but not a grain free flour. White Sorghum flour.
I had to go further to work something out here. To not have bickies for Christmas as well,...
would not be really a joy for me.
I worked out a really delicous version. I am very happy with the taste for sure.
Also my partner is pretty happy with it. But he preferes the normal gluten free version.
But good to know, he also would be ok with my MM version.
I did 2 experiments. The first one for me works the best. But, contains more fat.
In my second experiment I used only half of the fat, but,... it changed the consistency form cross to chewy.
I like the cross version. I rather like it very cross than chewy.
I will give another option a go, to add a bit more fat again and more almond.
Maybe I can get a more cookie like consistency with that. But for now,
I want to give you my first version with more fat.
If you feel like it is to much, just half the fat and add one more tbsp maple,...
and you will get the chewy version.
You already will feel that when you work out the dough.
It will be more like a Maoam consistency, haha ---
but the good part is, it is nice to cut out the stars. It doesn't stick that much.
With the more fat version you will see and feel the difference.
You will need a bit more flour on the surface to work it out
When my third experiment works the best, I will let everyone know.
But for now,.... lets go with the more fat version.
But in my opinion, it is ok. When you do not eat the complete tray at once, haha ;-)
Ingredients to make around 40 stars
(I used a small cutter):
100g Besan flour
50g almond meal
20g Tapioca flour/starch
10g pure Vanilla extract powder***
1 tsp Dutch Cinnamon
4 tbsp Maple syrup (5 for the chewy version)
4 tbsp organic almond oil (2 tbsp for the chewy version)
1 pinch of salt
(When the dough comes difficult together, add a tiny splash of water)
*** I got a product from my organic store what contains
pure Vanilla extract mixed with dextrose powder.
Second version I personally prefer***
50g white Sorgum flour
50g Besan flour
60g Almond meal
25g Tapioca flour/sarch
1tbsp coconut sugar
1/2 tbsp pure Vanilla extract powder
2 tsp Dutch Cinnamon
4 tbsp organic almond oil
4 tbsp Maple Syrup
1 pinch of pink or sea salt
*** I personally like this version the most. It is a a crunchy bicki I prefer. A bit more airy than my other version. If you want to have it more softer, maybe shorten the baking time by 2 minutes.
For the icing:
1,5 cups unbleached, aluminium free icing sugar
1 tbsp pure Vanilla extract powder
2 tsp Dutch Cinnamom
Directions:
1. Mix all ingredients for the dough into a bowl. Work it out with your hands. I always do.
When the dough comes together,... wrap into cling foil and shape like a sausage.
Store in the fridge for at least 2 hours.
I always do my dough one day ahead.
2. Prehead oven to 170C
3. Cut out all your stars and place on a baking tray with baking paper.
To do that, add a bit of flour on your working surface, cut off a piece of the dough and use your hands to flatten it.
For me a roller didn't work well. So I rather use my hands for that. Flatten the dough to about 1cm thick stars, using a small star cookie cutter.
4. Bake for 12 to 15minutes. (depends on how hot your oven turns, mine always needs time to really heat)
In the meantime mix the icing sugar with the vanilla and cinnamon.
5. Remove stars from oven, cool down for 5 minutes on a cooling rack and add into the bowl with the icing when still warm. Cover well with the icing, place into a cookie box (lid not closed) and cool down complete (shut with the lid).
6. The bickies will be delicous straight away, but get better with each day in the cookie box...
... when they even last that long, haha.
Enjoy and MERRY CHRISTMAS


German Lebkuchen
(Christmas delight)
Christmas season! Time to get a little bit busy in the kitchen from now on, right.
Gingerbread, (It is not an acutall ginger bread,... I don't know why Lebkuchen is translated into gingerbread.
The Lebkuchen is based on a spice mix, but not on ginger.)
tastes the best when baked ahead. And as longer it rests, as better the taste turns.
Like with all Christmas bakings.
Store in a tin cooky box and the gingerbread will be fine.
But when your house is to warm, you better store maybe in the fridge.
Remove 1 hour before you want to eat it to bring it back to room temperature.
But when your house or apartment is nicely cooled and with a pleasant room temperature,
the gingerbread should be fine.
I worked a little bit around to make this years Christmas sweets as MM approved as possible.
And so far I am happy with my results. My first gingerbread was ok, but a bit to dry and to much Cardamon.
I think my second batch turned out really nice.
And when you are ok with cocoa, this gingerbread will lighten up your Christmas table.
Did you know that in Germany we place a big christmas plate named "bunter Teller" (mixed up plate)
under the Christmas tree? On the plate are all the different Christmas sweets plated we Germans love.
This was always the best on Christmas for me as child.
The smell of the mixed sweets really filled the room with Christmas aroma.
Gingerbread, Christmas cookies, Domino stones, chocolate santas, yellies and much much more.
This is how it looked. Mum put on a bit different things,
but this is the way it often looks under German Christmas trees :-)
Dad told me, when he was a kid, granny even decorated the tree with all that sweets.
Back in the days they didn't have much of a christmas tree decoration. So she put on the sweets.
And the tree was placed in dads, room, haha --- you can imagine the rest ;-)
Yea, this was Christmas.

Today I do not do that anymore. In the first place because of the heat. The sweets simply do not stand the heat.
And secondly, because we can't eat it anyway, haha --- most of it is not vegan.
But, I always do my best to bring some Christmas aromas and tastes on my table.
And ginger bread is the first to start with :-)
Let's go...
To make around 25 pieces you need:
200g Besan flour (sieved)
10g Tapioca starch
90g fine grated sweet potato
15g almond meal
10g (1tbsp) fresh grated orange zest
10g (1tbsp) fresh grated lemon zest
7g (1/2 tbsp) Bi-Carb (aluminium free)
10g pure Vanilla bean sugar (or fresh vanilla)
1/8 tsp Nutmeg
1/8 tsp Cardamon
1/2 tsp dutch cinnamom
20g (3tbsp) organic cocoa powder
1/4 cup Maple syrup
1 tbsp coconut sugar
50g black currants
300ml filtered water
25 roasted plain almonds
1/4 cup unbleached icing sugar
1/2 tbsp cocoa powder
1/2 tsp dutch cinnamon
1/2 tsp pure Vanilla extrat sugar
Directions:
1. Preheat oven to 170C
2. Fine grate the sweet potato (skin removed) and mix with all the ingredients for the batter into one bowl.
Mix until smooth.
3. Add batter into a baking dish and top with the almonds. Bake for 35minutes, remove when done and cool down.
Cut into pieces or use a cookie cutter in whatever shape you like
4. Now you got 2 options. Either spread it with a bit of maple syrup to make it look shiny.
Or, make it even more christmassy in taste.
Mix icing sugar, cocoa powder, cinnamon and vanilla into a bowl and cover the ginger bread with it.
Use a little sieve to do that. But that is optional of course.
I personally like to do that, but when you want to stay away from icing sugar, the gingerbread will be fine without it.
You also can add some raisins if you like. I also do that, but was out of it for these ones.
Enjoy and Merry Christmas

Mango Jam
Jams are a great product to top your pancakes or sandwiches with.
Or lighten up your yoghurt.
Unfortunately they contain a lot of sugar and often not really much fruit.
With our mango season, we got plenty of mangos from the stores.
And I thought, why not make a mango jam! I am not even sure if I ever saw
a mango jam at the stores! I remember passion fruit jam, but not mango.
And I really love mangos. One really great fruit!
My jam really is so delicous. And the best,... no nasties!
A really great extra treat.
So here is my recipe :-)
To make 6 jars you need...
1850g mango (about 7 good sized ones) - cut into smaller pieces
70ml lemon juice
6 tbsp coconut sugar
2 tbsp maple syrup
1/2 the skin of a vanilla pot***
3 tsp potato starch dissolved in a splash of water
***when you use vanilla pots, never throw away the skin!
This kind of cooking is perfect to add some vanilla taste to it.
When you have only full vanilla pots, just use only half of it, with the seeds.
Direction:
1. Cut mango into small pieces and add to a pot.
2. Add all ingredients, except of the potato starch, to the mango and bring to the boil.
When boiling, turn down the heat to a simmer and cook until the mango mashes.
3. Add the potato starch/water mix and combine with the mango.
4. Turn off the heat and if bigger pieces are still present, mash with a fork.
5. Fill straight away into jars, close the lid and place up side down (lid on the bottom)
for 10 minutes on your kitchen counter. This way you vaccum seel the glas. And it needs to be hot.
6. Turn jars with the lid upwards again and just cool down.
ENJOY

Hazelnut Slices
Sometimes it is just nice to have something for the afternoon tea, right. Or maybe for breakfast?
A lot of people like to have something sweet for breakfast. This "cake" is good on its own.
I am happy with the moisture in this slices.
But I think it would also be nice to toast and top with your favorite marmalade or so.
But, I like to enjoy it the way it is, plain and with a nice coup of tea.
But it sure is nice for the lunch box as well!
I always was a lover of nut cakes. And Hazelnut is one of my favorites.
In Germany, Hazelnut cake is pretty popular.
To bring moisture into the cake, I worked with Aquafaba this time.
Aquafaba is the water where you cooked your chickpeas in. Don't pour it away. It is great for baking!
I always cook my own chickpeas.
And I store the cooked chickpeas with the cooking water in a glass jar in my fridge.
I tried a couple of things with gluten free baking and aquafaba.
I baked a birthday chocolate cake (Sacher Torte) for my friend, what really turned out great.
I know chocolate is a no food for most of MM followers, but when I bake this cake again for my sweets, I will post a recipe anyway,... to my gluten free section. Non MM followers should really try this cake. It is awesome.
Working with Aquafaba is not a difficult thing. It is just like working with egg whites, nothing more.
So please don't be afraid of it, ok!
Let us start with the easy recipe I worked out for us.
For the Aquafaba you need:
5 tbsp of the chickpea water
1/4 tsp lemon juice
For the cake batter you need:
200g Besan flour
40g Hazelnut meal
1/2 tbsp Chia powder
1/2 vanilla pot (the seeds inside)
1 tsp Bi-Carbonate Soda
3 tsp organic coconut oil
5 tbsp Maple Syrup
1 pinch of pink salt
For the finish:
A little bit of organic, unbleached icing sugar (optional)
Directions:
1. Preheat oven to 180C
2. Make the Aquafaba. Just add the aquafaba water into a bowl and start to process with a hand mixer.
I always use a hand mixer, because I do not have a kitchen machine for making batters and bread doughs.
Making aquafaba needs a bit of time. You have to work it out like egg whites.
Until it is firm and fluffy enough that you can turn the bowl upside down without falling out of the bowl.
When the consistency is half way there, add the lemon juice. That will stabilize it.
3. Add all ingredients for the batter into a bowl and mix well together to a smooth batter.
4. Carefull fold in the aquafaba.

5. Add the batter into a cake tin for a loaf.

6. Bake until golden brown - that should take approx 30 minutes.
7. Remove from the oven and let it cool down complete.
8. Sprinkle with some organic, unbleached icing sugar if you like - but that is optional of course.
I suggest to store the cake in the fridge. Thats what I do. With the warmer season it is better to be save.
ENJOY :-)
7. Remove from the oven and let it cool down complete.
8. Sprinkle with some organic, unbleached icing sugar if you like - but that is optional of course.
I suggest to store the cake in the fridge. Thats what I do. With the warmer season it is better to be save.
ENJOY :-)

Ange's Jam Drop Cookies
I once made the cookies from the MM book. But for me it turned to a total disaster.
Already the consistency of the dough made it impossible to form to cookies, without breaking apart.
I was not able to form this drops for the jam, so I simply made flat cookies.
The end products turned out pretty chewy.
So for me that was not working and I never tried it again.
But I heard some people who told me the recipe worked for them. So it is up to you what to choose.
When the MM recipe works for you, that’s great. But for me, I choose my own recipe.
Anyway,... I watched "River Cottage Australia".
And Paul reminded me with his baking of this cookies, that I want some too.
So I gave it a go. My mum sent me some so delicious homemade blackberry jam.
My dad picked the fruits on his own, they are wild grown fruits.
Perfect,... what better things to do with the jam than baking this kind of cookies, right.
I worked out a pretty good dough. I am happy with everything. All ingredients are in the MM program range.
But please don't eat all at once, even if it is hard to resist, haha,... because this cookies contain fat.
But I think to enjoy one from time to time is really a nice treat for an afternoon tea :-)
And coconut oil is recommended from Anthony for the Thyroid healing.
Ok, here we go.
Of course you can use whatever jam you like. I recommend wild blueberry jam or mixed berry jam.
To make either
12 cookies a 30g or 18 a 20g
you will need:
150g Besan Flour
40g desiccated coconut
50g almond meal
2 tsp unbleached vanilla bean sugar ***
(or real vanilla, half a pot)
50 ml almond oil
50g Maple Syrup
1/4 cup activated almond milk
1 pinch of pink salt
jam of your choice
Some unbleached icing sugar to finish
*** I got the product from my organic store.
The product is made from real vanilla beans from Madagascar.
Direction:
1. Add all ingredients into a bowl and mix with your fingers to a dough.
The dough should be smooth and not to sticky.
You don't need to chill the dough, you can go straight over to form the cookies.
Except it is to warm. If so, rest in the fridge for half an hour.
But I figured out that the dough is much better shapeable, when not to cold.
2. To form the cookies take 20 or 30g of the dough, form a ball,... and press in the middle of your palm with both hands to a flat shape. use your thumb and index finger to shape the round, whilst you gently form the well in the middle with your other thumb. Put on a baking tray with baking paper.
3. When you finished all cookies, fill with a tsp of jam of your choice.
4. Bake in the preheated 180C oven for 15 minutes, or until golden brown.
5. Remove from oven when done and cool down on a cool down tray.
6. Cover with unbleached icing sugar when cooled down.
The cookies will be nice and crispy when fresh baked. Rest in a cookie tin,... but they will soften up.
But I personally don't mind, because softened they are same delicious, if not even better :-)
ENJOY

German Winter Fruit Salad
In Germany, fruit salad is different than here in Australia.
When I ordered a fruit salad here for the first time, I was very surprised what I received.
Actually kind of dissapointed, but just, because I expected this kind of salad I made.
The fruit salads here are made with water melon, rock melon, pineapple and some also add grapes.
All plain mixed together. Thats it.
Don't get me wrong. This sure is also great.
Specially in the summer heat, such a melon "salad" is just great.
In Germany, I grew up with this kind of fruit salads.
The main part is apple, banana, orange.
I don't know why, but these 3 fruits enjoyed on one spoon together is a flavour bomb for me.
I always also mix it up with lemon juice, cinnamon and maple syrup.
I also love to add other winter fruits like mandarin and grapes.
Sometimes I add raisins to it --- but because I am not a huge fan of them, I leave them off the bowl.
Vanilla and roasted almonds are also great add for me, when I want to make it christmassy.
At the time, we enjoy this salad every evening.
Winter season needs more effort to stay away from a cold and flu.
So we have this every evening :-)
It also gives you an extra apple a day,... and an option to play around with apples.
For me this is important, because apples are not my favorite fruit. Actually, I ate not many apples in my life,
because I do not like them the way they are. I like them in a cake, apple strudl, apple sauce, compote etc.
But the plain apple always was a struggle for me. But thanks god I found some I almost enjoy.
I know eat apples every day. But 1-2 a day really is enoug for me. So this fruit salad sure is great for me to add an extra apple to my day. And as I mentioned, the flavour combination of when you add all 3 fruits into your mouth ---
BAM. I love it!
Ok, here is my recpe for 2 serves - easy and quick to make.
Just give it half an hour in the fridge to rest.
Remove from (to bring it more down to room temperature) fridge half an hour before you going to eat.
With this colder temperatures it is fine to leave it on the kitchen counter.
1 middle sized organic red coloured apple (don't use a green one!) - cut into smaler pieces
1 organge *** - cut into smaler pieces
1 banana - slice
10 green or red, or both, grapes
1 mandarin - separat wedges
1/2 tsp organic or dutch cinnamon
1 tbsp fresh lemon juice
1 tbsp maple syrup
*** I always leave the white parts of an orange, because they also contain nutrience.
But feel free to remove the skin and use the plain pulp.
Add all ingredients into a bowl and mix well.
Set aside (in the fridge if it is to warm) for a rest.
ENJOY :-)
Recommondation: to turn this salad to a great summer/spring salad, add raspberries and leafe the cinnamon.
And use lime instead of lemon.

Hazelnut & Raspberry Muffins
I finally managed to bake a gluten, sugar and fat free cake with a really good consistency.
Ok, not a cake, but muffins, mini cakes.
So far all the gluten free baking I did wasn't that satisfying for me,
because it often is simply to dry. Also the fluffyness often was missing.
This time I had an idea I had to give a go. Gluten free baking always needs a moist part.
Also a part what makes it fluffy.
For me nut flours work pretty good for that.
I usually use almond meal. But somehow I had hazelnuts in my mind. And I love hazelnuts!
This muffins really turned out great. Moist, fluffy and delicious.
Not to sweet, because they are also sugar free (except of the icing on the top).
With this muffins I am really happy. I hope you like them too :-)
For 8 muffins you need ( yes, one was already missing when I took the photo :-))) ):
50g Hazelnut flour
100g white Sorghum flour
3/4 tbsp baking powder
1,5 tbsp flaxseed flour
1,5 tbsp Tapioca starch
1 generous splash of organic maple syrup (up to you how sweet you want it)
1/4 tsp pink salt
1/2 a vanilla pot seeds
1 cup frozen raspberries
150g (200ml) activated, unsweetened almond milk
unbleached icing sugar
Preheat oven to 180C
1. Add all ingredients, except of the raspberries into a bowl and mix well to combine.
2. Add the rasberries and mix again.
3. Add into a muffin baking dish
4. Bake for about 30 minutes
5. Remove from oven and cool down
6. Cover with icing sugar if you like
ENJOY
